Mushroom spinach vegan “quiche”

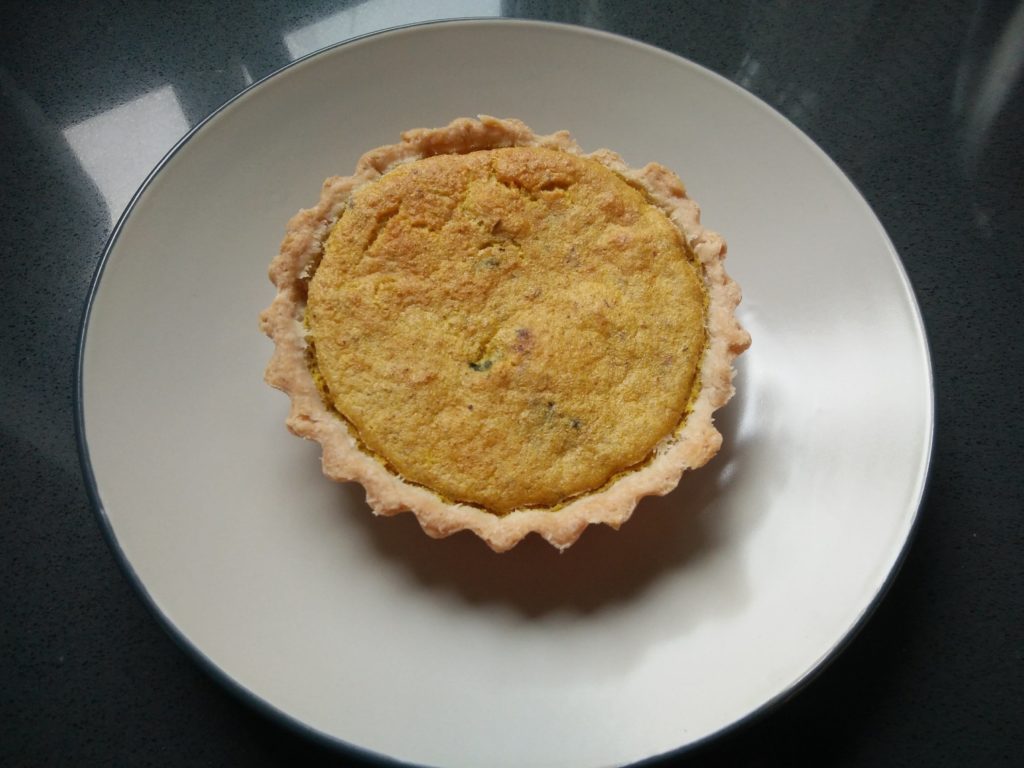
Is a quiche a quiche if there are no eggs and cream involved? Is pastry dough pastry dough if zero butter was used in the making of it? Maybe I should call this recipe a vegan vegetable tart, instead of a quiche, just to be safe from all the people complaining about veg*n calling dishes the same as their not veg*n counterparts, just because it’s easier to convey what kind of dish it is.

Mini vegan veggie tart

Mini vegan veggie tart

In any case, this vegan tart can be adapted to whichever (seasonal) vegetables you want to use. The base can be used for sweet as well as savory tarts. Fruit pies, frangipane tart, veggie tarts! The uses are pretty much endless. I tried this crust a couple of times, to make sure the first time wasn’t just a fluke. And it wasn’t. The next step will be finding a gluten-free flour mix with which the recipe works well.

Ingredients

For the crust:

  • 275 grams all purpose flour
  • 1/2 tsp salt
  • 120 grams refined coconut oil (solid)
  • 6-8 tablespoons (90-120 ml) cold water

For the vegetables:

  • 250 grams mushrooms, cleaned
  • 1 onion (±125 grams) onion, peeled and finely chopped
  • 300 grams frozen spinach, thawed and liquid squeezed out
  • olive oil
  • salt & pepper to taste

For the “custard”:

  • 400 grams silken tofu
  • 240 ml water
  • 140 grams chickpea flour
  • 2 tablespoons nutritional yeast
  • 1/2 teaspoon turmeric
  • 2 teaspoons dried oregano
  • 1 teaspoon ground coriander
  • 1 teaspoon salt
  • 1/4 – 1/2 teaspoon cayenne pepper (to taste)

Instructions

For the crust:

  1. In the bowl of a food processor or stand mixer with paddle attachment, mix the flour and salt. Add the coconut oil in small(ish)1 pieces, and mix or process until only very small pieces of oil are left and it looks like a crumble.
  2. With the machine still running, add the cold water, one tablespoon at a time, until a cohesive dough forms. Not all water might be needed.
  3. Remove dough from processor / mixer, give it a quick knead to bring it all together, and start rolling out.
  4. For individual / mini quiches, cut the dough in pieces2 before rolling each individually about 3 mm thick.
  5. Line each tart mold, carefully pushing the dough into the crimps.
  6. Set aside in the fridge3 before filling and baking.

For the vegetables:

  1. Preheat oven to 180°C.
  2. Chop the onion. Cut the mushrooms in quarters. Mix both and spread in a (lined, for easier cleaning) baking tray. Spray some olive oil, season with salt and pepper.
  3. Bake mushrooms for 20 minutes, until golden brown. Remove from the oven and let cool.
  4. Meanwhile, thaw the spinach. Squeeze as much liquid as possible and chop finely. If using fresh spinach, chop & saute in a bit of oil until wilted and the liquid has evaporated.
  5. Allow spinach to cool. Then mix with the mushrooms.
  6. Note: this tart can be made with any vegetables you want. Calculate 700-750 grams of vegetables in total.

For the custard:

  1. In a blender, mix tofu and water together.
  2. In a bowl, mix chickpea flour & spices with a whisk.
  3. Add the mixed tofu to the chickpea flour and mix to combine. Let it rest about 10 minutes before proceeding.

Assembly and baking:

  1. Preheat oven to 175°C.
  2. Take the lined tins out of the fridge, divide veggies between the tins, then pour custard to fill the crust4.
  3. Place the tins on a baking tray.
  4. Bake 20-25 minutes until set and golden.
  5. Remove from tins and serve.

Servings

8-10 servings

Notes
  1. about a tablespoon worth
  2. With this recipe I had enough for 9 10 cm tarts, or 1 24 cm + 1 15 cm
  3. The crust can easily be made the day before baking. Just keep it in the fridge until filling & baking time
  4. If making one big quiche, mix veggies with custard, then pour into crust

Apple blackberry cake (gluten & lactose free)

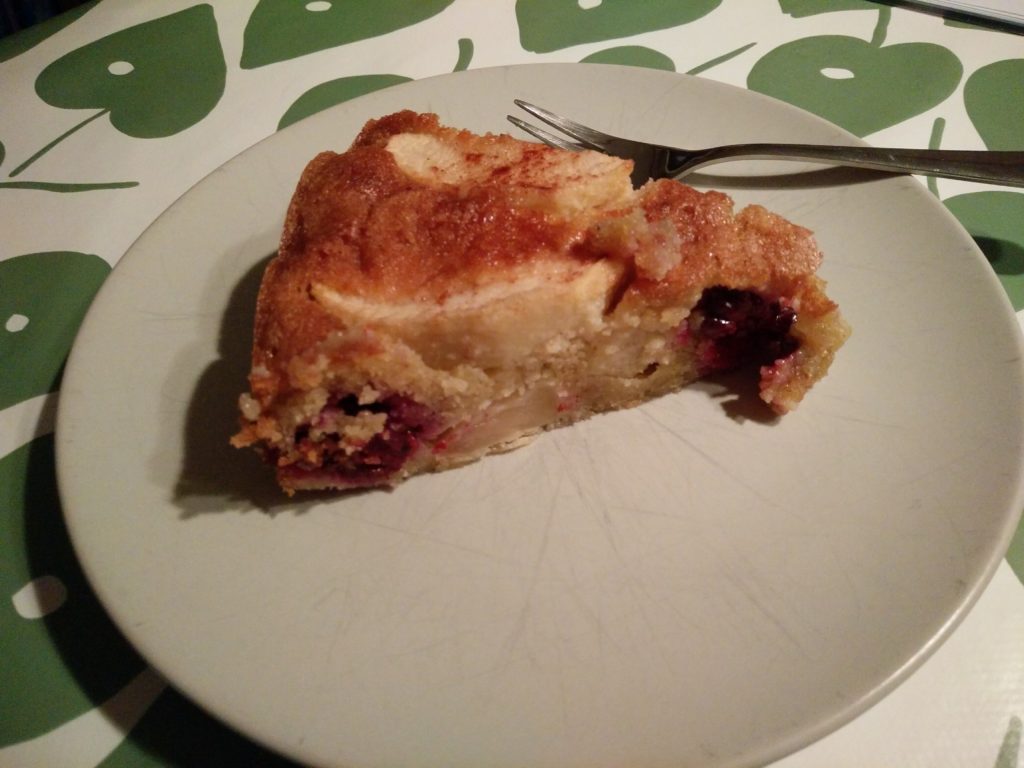
Another birthday, another cake!

A couple weeks ago I presented Jan with several options for his birthday cake, and of them he chose an apple & blackberry cake. Since we were going to be sharing with friends, one of them needs to eat gluten & lactose free, I went and adapted the original recipe. And here is my version.

Ingredients

  • 125 grams (refined) coconut oil1
  • 125 gr (cane) sugar 2
  • 3 eggs 3
  • 1 tsp vanilla essence
  • 50 grams ground almonds 4
  • 50 grams oat flour 5
  • 50 grams fine corn flour (not cornmeal, not cornstarch!)
  • 1/2 tsp salt
  • 3/4 tsp baking powder
  • 2 apples
  • 150 grams blackberries
  • 2 tbsp cane sugar + 1 1/2 tsp cinnamon for topping

Instructions

  1. Preheat oven to 170°C / 150°C if using convection. Line the bottom of a 20-22 cm spring form with baking paper.
  2. Soften the coconut oil by either leaving it in a warm place or microwaving it at low power for 30-45 seconds. Add the sugar and mix until well combined and sugar starts to dissolve into the oil.
  3. Add the eggs, one at a time, to the oil-sugar mixture, and mix well. Add the vanilla essence and mix.
  4. Combine ground almonds, oat & corn flour, salt & baking powder in a bowl. Add to the oil-sugar-egg mixture slowly and mix until a smooth dough has formed.
  5. Peel and core the apples, slice them in 12-14 pieces each. Separate 8 slices for decoration, and cut the rest in smaller pieces.
  6. Add the apple pieces and most of the blackberries (leave 4 for decoration) and fold gently.
  7. Pour the batter onto prepared spring form and spread (more or less) evenly. Decorate with the reserved apple slices and blackberries.
  8. Mix sugar and cinnamon for topping and sprinkle on top of cake.
  9. Bake cake in preheated oven, middle rack, for 50-55 minutes. A cake tester inserted in the middle will come out clean (albeit greasy) when cake is ready.
  10. Loosen the edges of the cake with angled spatula / knife, let cool enough to remove cake from spring form and let cake cool on cooling rake.

Servings

8 servings

Notes

  1. Refined coconut oil tastes and smells less than non-refined, thus making it ideal to bake with when you aren’t planning on a coconut tasting cake
  2. I’m picky with sugar, I like raw / cane sugar, not white. Use whatever you prefer
  3. Be kind to the hens, try to get eggs from free range / bio producers, but that’s just me
  4. You can grind the almonds yourself. Use raw almonds.
  5. You can make the oat flour yourself too. Just grind some oats in a blender.

Blueberry galette

It seems like I am in a blueberry kick. I do love me some blueberries, and since frozen ones are so easy to keep, it’s easy to reach for them for a quick dessert.

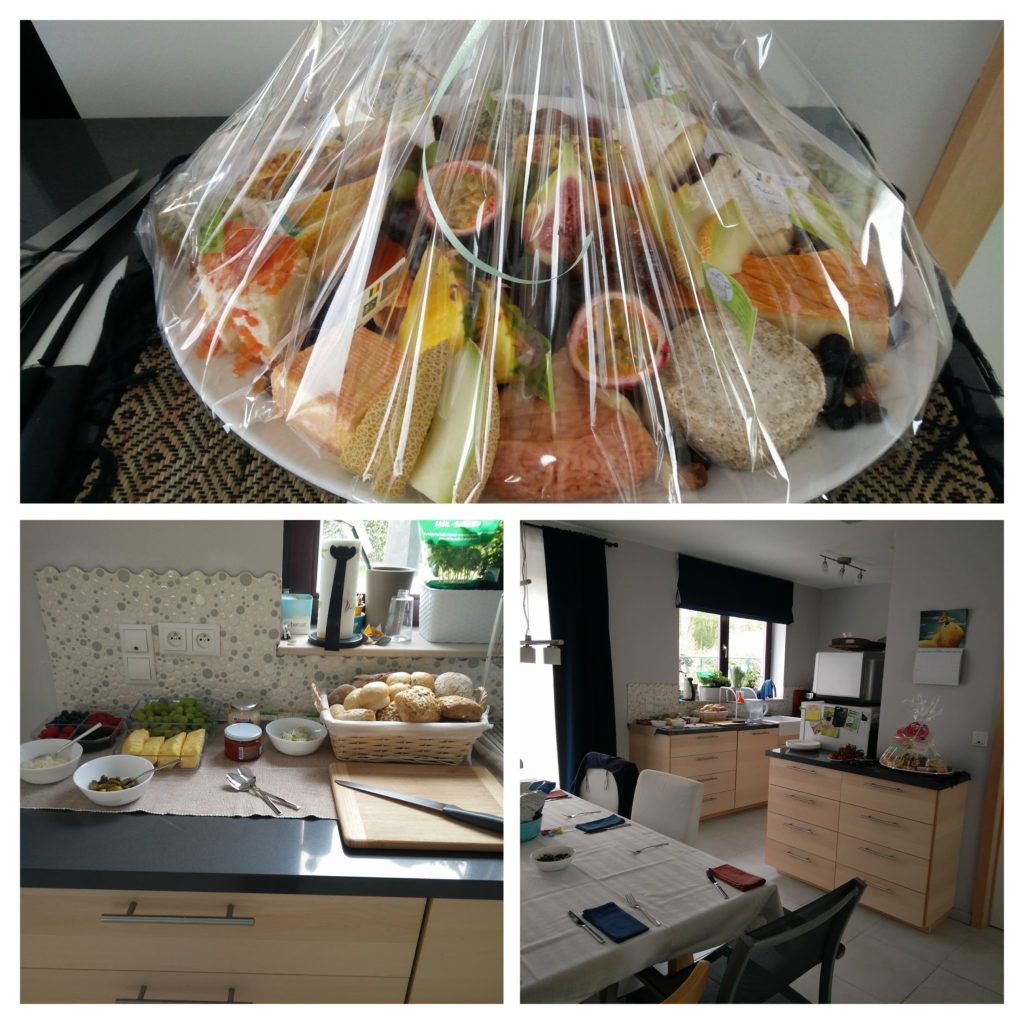
We invited the family over for Easter Sunday lunch. We served a selection of cheeses, fruit & breads.

Spread of cheeses, fruit and breads

And for dessert I wanted something easy and quick, that wasn’t fiddly and could be baked while or right after lunch to have a bit later as dessert. I also wanted something relatively light (not loaded with butter and eggs) and with lots of fruit. A galette came to the rescue!

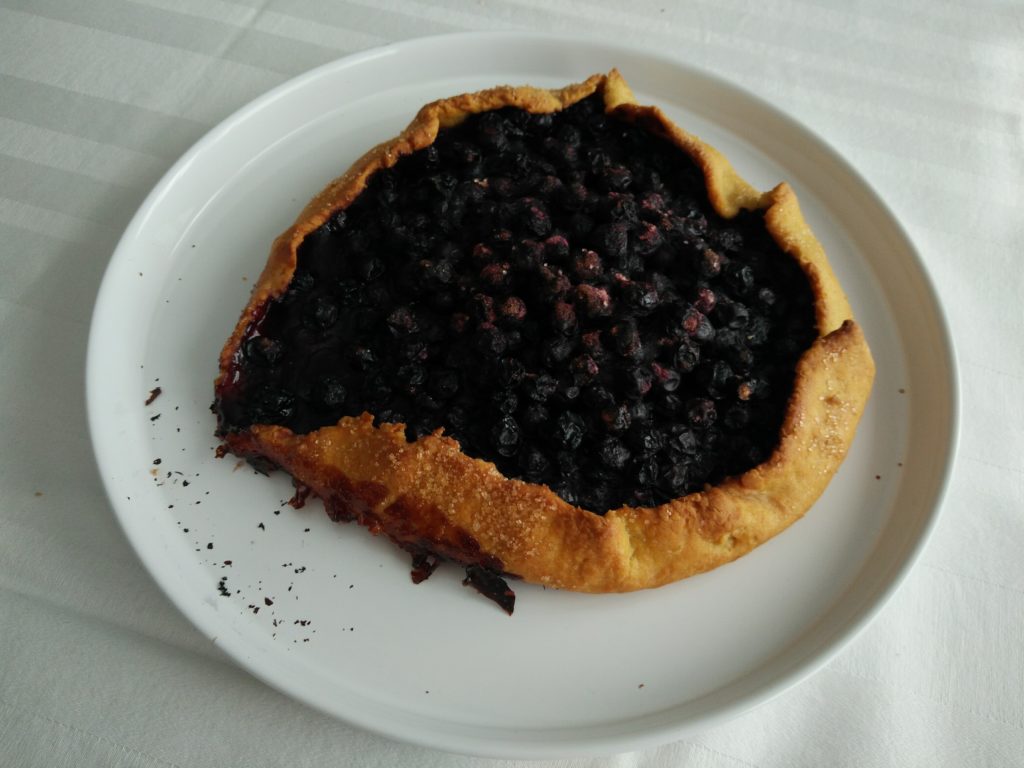
Blueberry galette

Blueberry galette

While a traditional galette pastry is made with butter, this olive oil version turned out to be perfect as well. It stood up to the juicy berries, and provided a nice crunchy edge. Thanks to the tiny amount of sprinkled sugar, it also turned a nice shade of golden.

Note that I didn’t pinch that one fold quite enough, and it folded back open during baking, letting the juices escape.

Ingredients

For the dough:

  • 200 gr flour
  • 1 tsp salt
  • 30 gr sugar
  • 50 ml olive oil
  • 75-100 ml water

For the berry filling:

  • 450 gr (frozen) blueberries
  • 30-40 gr sugar
  • 2 tbsp (30 ml) lemon juice
  • 2 tsp (10 ml) vanilla essence
  • 30-40 gr fine corn flour
  • 1 tsp sugar (for sprinkling)

Instructions

  1. Combine all ingredients for the dough in a bowl, starting with only 75 ml water. Mix it, adding more water if needed, and for a bowl with it. Let rest for an hour or while the berries thaw.
  2. Mix the all the ingredients for the filling in a bowl and let sit for an hour, or while the berries thaw.
  3. Preheat oven to 180°C.
  4. Roll out the dough into a (approximate) circle shape, about 25 cm in diameter, on a piece of parchment paper. You don’t want the dough to be too thin, it needs to stand up to being folded over the filling.
  5. Spoon the berries on to the middle of the dough circle, leaving 4-5cm free all around. Reserve the liquid!
  6. Fold the edges of the pastry over the filling, pinching the folds so they stick together. Pour the reserved liquid on top of the berries. Sprinkle 1 tsp sugar over the pastry edges.
  7. Transfer the galette (and parchment) to a rimed1 baking tray, and bake at 180°C for 30-35 minutes, until the berries are all jammy and the pastry is crunchy and golden.
  8. Let cool on a cooling rack for 15-30 minutes. Serve lukewarm, with ice cream if desired.

Servings

8 wedges.

  1. Trust me on this one, and use a rimed tray, chances are the filling will escape, and flow on to the bottom of the oven and burn to a sticky bubbly and sharp caramel there. Avoid that!

Lemon blueberry swirl cake

Having friends over to visit means I get to bake. And I love it.

Having friends over to visit with allergies and food intolerances, means I get to experiment with baking. Which I love even more.

So after a week of searching the internet for a lemon blueberry cake that fitted the bill (vegan, gluten free, nut free, and preferably banana free), I found two recipes I could mix & match and adapt to my taste. From those two recipes a third was born, and I bring it to you.

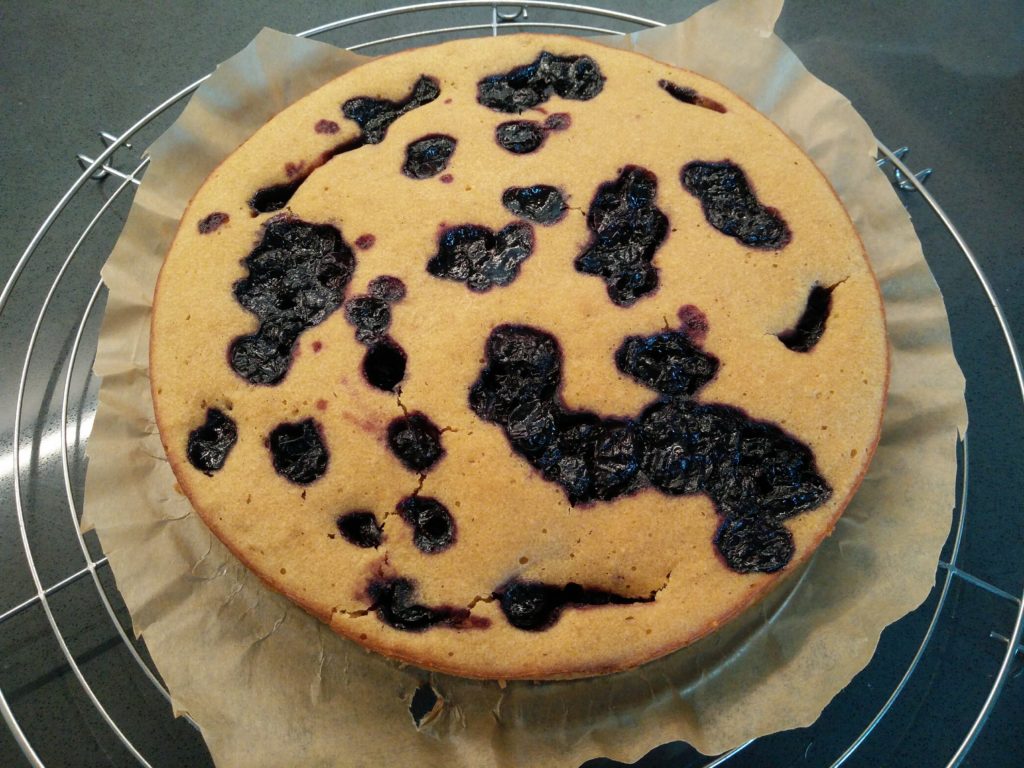
Lemon blueberry cake

Lemon Blueberry Cake

Ingredients

Blueberry compote

  • 225 gr (frozen or fresh) blueberries (I used frozen, because available all year long at a reasonable price)
  • 30 gr (coconut) sugar
  • 30 ml water

Lemon cake

  • zest & juice of two lemons
  • 120 ml soy milk (or any other plant based milk)
  • 2 egg replacers (I used v-eggie by P38, a local Belgian company, feel free to use any egg replacement available to you, or flax / chia egg)
  • 50 gr (coconut) sugar
  • 30 ml olive oil
  • 1 tsp vanilla essence
  • 90 gr fine polenta
  • 110 gr fine almond meal (almonds are seeds, not nuts)
  • 1/4 tsp salt
  • 1/2 tsp baking powder
  • 1/2 tsp baking soda

Instructions

Blueberry compote

  1. Put blueberries, sugar and water in a small saucepan. Bring to a boil, lower heat to simmer, and simmer, stirring from time to time, for 15 minutes. The compote will have thickened and have a glossy look.
  2. Let cool while preparing the cake batter

Lemon cake

  1. Line the bottom of a spring form with baking paper and set aside. Heat oven to 175°C.
  2. In a mixing bowl, add all wet ingredients (from lemon up to and including vanilla essence) and mix thoroughly so sugar dissolves.
  3. Add dry ingredients to mixing bowl, and whisk until no lumps remain.
  4. Pour 1/2 to 1/3 of the cake batter in a prepared form. Spoon half the compote on top of the cake batter. Top with the remaining cake batter, and then the remaining compote. Swirl with a knife / toothpick if wanted.
  5. Bake cake in pre-heated oven for 35 minutes, or until a toothpick inserted in the middle comes out clean.
  6. Let cool in tin for 15-20 minutes, then loosen rim, remove cake, and let cool on a cooling rack.

Enjoy!


As an aside, I realize I need to work on taking better pictures of my recipes. It’ll never be a step by step because who has time for that?!

But I really want to remember to take a picture of the plated cake, not just the teaser picture of the cake cooling on a rack, before diving into it. I keep forgetting, because I want to try it! And I want friends to try it!

No bake blueberry cheesecake

A few days ago we got an invitation for a friend’s “Flower-power” spring themed birthday party. She requested that we bring something that reminds us of spring. So not wanting to do the typical spring flowers, and my idea of a jar filled with natural fertilizer1 being banned by the other 50%, we settled on cake.

My first idea was to create a three layer lemon-poppy seed cake, with a fruity filling, cover it in yellow marzipan, and then decorate it with sugar paste flowers (daisies, mostly). But the store being closed and a certain lack of ingredients and time meant I had to find an alternative. Pinterest2 and a childhood memory of no bake cheese cakes to the rescue. After browsing for a while for spring-themed cakes, I settled on a blueberry no bake cheesecake. Mixing a vegan recipe, with a not even vegetarian one (the childhood cake uses gelatine3, and turning it vegetarian was a challenge. And it turned right the first time round!

I basically adapted & mashed so many recipes that it’s not even worth it mentioning them, since this cake doesn’t resemble any of them any more.

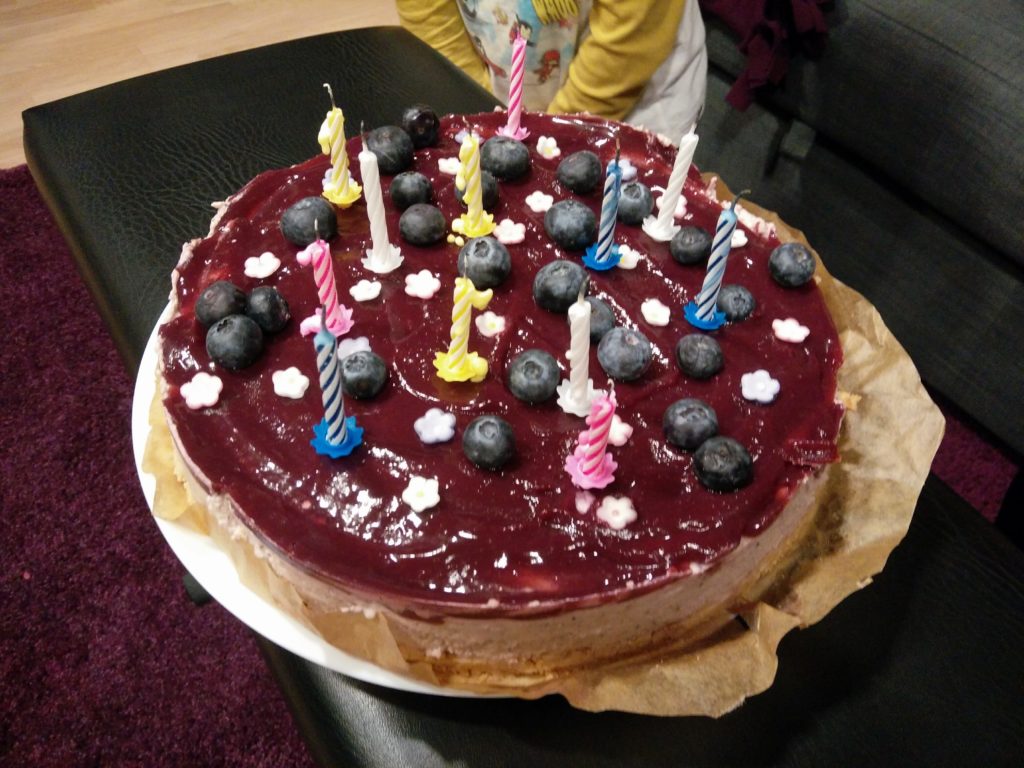
No bake blueberry cheesecake with lighted birthday candles

Happy Birthday for the flower power girl

Ingredients

For the crust

  • 200 grams “maria” cookies
  • 100 grams butter

For the cheesecake

  • 300 grams cream cheese, room temperature
  • 250 grams Greek yogurt
  • 375 ml cream
  • 250 grams blueberries
  • 125 grams sugar
  • Zest and juice of one lemon
  • 2 grams agar agar powder

For the topping

  • 200 grams blueberries
  • 4 grams agar agar powder
  • 25 grams sugar

For decoration

  • 50 grams blueberries
  • sugar flowers
  • (fresh edible flowers if you can find them – I couldn’t)
No bake blueberry cheesecake with candles blown off and child in the background

No bake blueberry cheesecake

Instructions

For the crust

  1. Line the bottom of a spring form with baking paper. Place spring form on dish (the cheesecake will most likely leak a bit).
  2. Melt butter in microwave or pan over medium heat.
  3. Meanwhile, crush cookies to thin dust either in a food processor or by wacking them with a rolling pin. (Second option recommended if you have anger you need to get rid of).
  4. Mix butter & cookie crumbs until it resembles wet sand. Pour mixture into lined form and press with hands to create an even crust.
  5. Place in refrigerator while making filling.

For the cheesecake filling

  1. Pour 250 ml of cream into a small sauce pan, sprinkle 2 grams of agar agar powder on top and let soak for a few minutes. Bring to a simmer, and whisk to dissolve agar agar. Simmer for a 3-4 minutes, whisking regularly to make sure it doesn’t burn to the bottom of the pan.
  2. Meanwhile, in a blender, blend blueberries with remaining cream.
  3. In a mixing bowl, mix cream cheese, yogurt, sugar, lemon zest and juice until smooth. Add blueberry mix and mix until well combined.
  4. Add agar agar cream to the blueberry mix and mix thoroughly. It should start setting and it can be whipped to a creamy consistency. Pour into spring form with crust and even top out with a spatula.
  5. Chill in refrigerator while making topping.
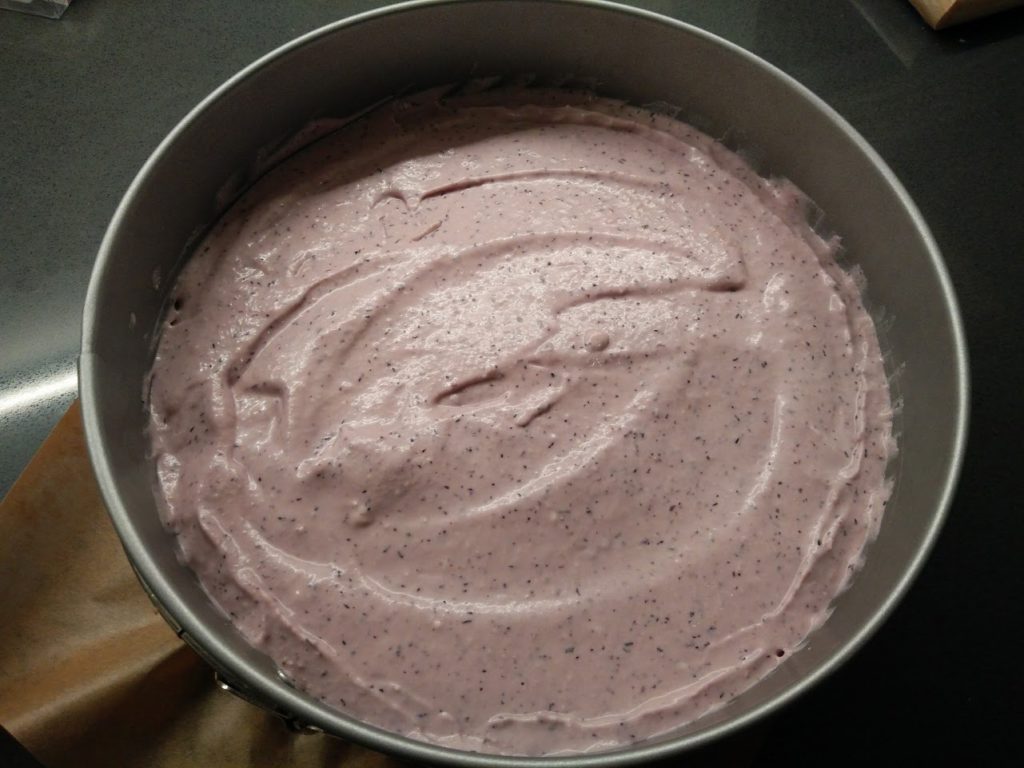
Springform filled with blueberry no bake filling

Blueberry cheesecake filling ready for chilling

For the topping

  1. In a blender, mix blueberries and sugar with about 100 ml of water until smooth.
  2. Sieve blueberry mix through a strainer to remove skins.
  3. Add enough water to the mix to make 500 ml. Pour into small saucepan and sprinkler agar agar on top. Let sit for 5 minutes for agar agar to hydrate.
  4. Bring to a boil, lower to simmer and whisk to dissolve agar agar. Simmer for 3-4 minutes, whisking to make sure it won’t burn to the bottom of the pan.
  5. If present, remove white foam from top of blueberry jam with a spoon before it cools down.
  6. Let blueberry jam cool to around 50°C, pour on top of cheesecake. Quickly tilt spring form around to distribute the topping evenly.

Decorate:

  1. Sprinkle blueberries on top.
  2. Place sugar (and / or fresh edible) flowers on top.

Keep refrigerated until ready to eat.

One benefit of using agar agar however, the cheesecake & topping will withstand higher temperatures since it won’t un-gel with warmth. So this is an ideal dessert for the summer months!

  1. Having lived rather rural for the last two years, the beginning of spring is always marked by the smell of fields being turned over and fertilized to prepare for the new crops.
  2. The rabbit hole for the makers
  3. Which is not vegetarian. Poor piggies.

Pumpkin muffins (lactose & gluten free)

Lately I am experimenting with dairy / gluten / egg free baking. Having friends that are allergic / intolerant to one of more of those, and me liking a challenge, baking for them is a good opportunity.

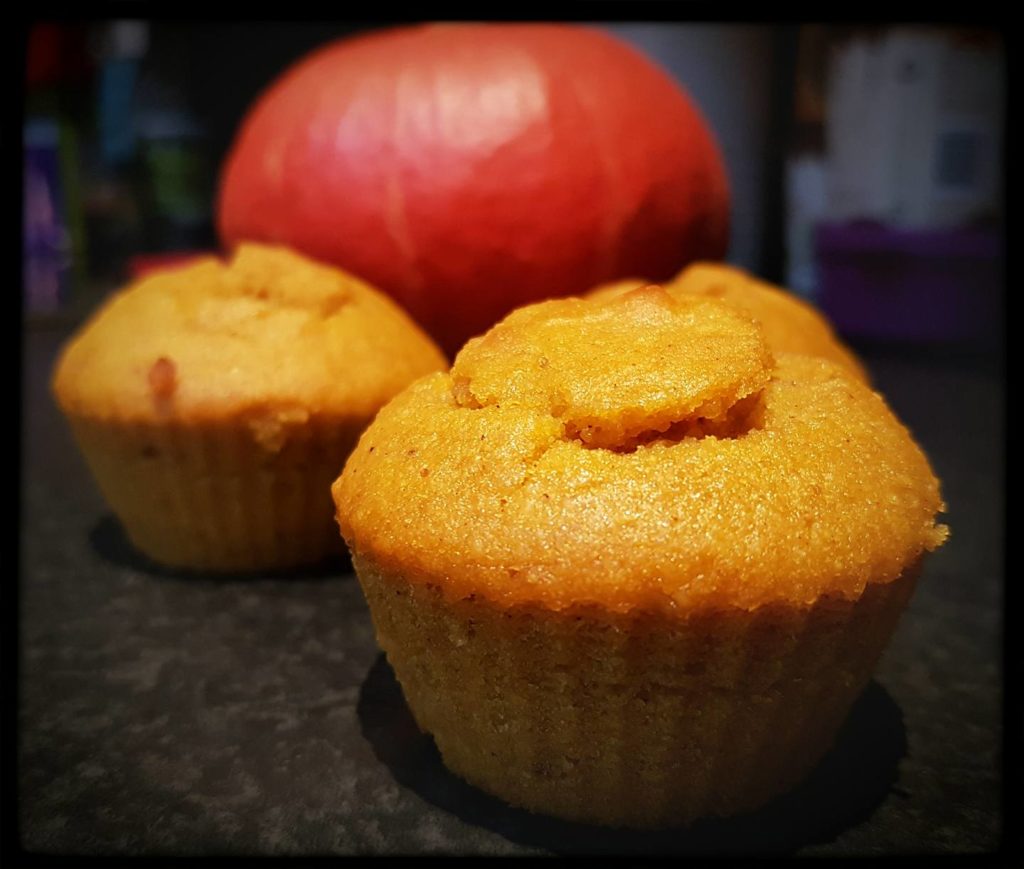
Pumpkin Muffins Photo credit: Nadege

Pumpkin Muffins
 Photo (c) Nadege Biojout


These muffins are both dairy & gluten free, but do contain eggs. I will experimenting with the egg part next. I am happy to say that they have a nice earthy spicy flavour, and a fantastic soft moist crumbly texture. Texture wise, they are faboulous, to be honest!

Ingredients

  • 1 1/2 cups pumpkin puree (to make: cut sweet pumpkin in quarters, scoop seeds out, and steam pumpkin for 25-30 minutes, or until the flesh starts to separate from the skin, scoop the flesh from the skin, mash, and measure) (to be updated with metric measurement)
  • 2 eggs
  • 175 grams cane sugar
  • 75 ml olive olive (use a mild one)
  • 60 grams corn-based all purpose gluten free flour (basically a mix of corn starch, corn flour, guar gum)
  • 60 grams quinoa flour (ground quinoa flakes works well)
  • 60 grams (white) rice flour
  • 1 tsp baking powder
  • 1/2 tsp baking soda
  • 1/2 tsp salt
  • 1/2  tsp each cinnamon, ground ginger, all spice & chinese 5 spice

Instructions

  1. Preheat oven to 175°C. Place rack in middle of oven. Line 12 cavity muffin tray with paper liners or silicon liners.
  2. In a big bowl mix pumpkin puree, eggs, sugar and oil very well with an immersion mixer. Alternatively you can use a blender.
  3. In a small bowl mix all flours, baking soda, baking powder, salt & spices. Add to wet ingredients and mix with a spatula until no blobs (very technical name) of flour are left.
  4. Divide batter among the cavities of the muffin tray.
  5. Bake in oven for 25-30 minutes, or until a toothpick inserted in the middle comes out clean.
  6. Let muffins cool enough to remove from tray, transfer to cooling rack and let cool (or enjoy warm, if you cannot wait).
14874881_10210742871917737_650073493_n

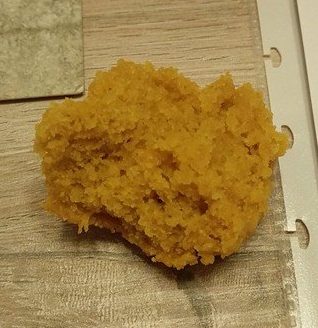
Open muffin showing the texture

I really couldn’t wait to eat them so I forgot to take a picture before I started. Here you can see the nice crumb & fluffy texture of the muffins.

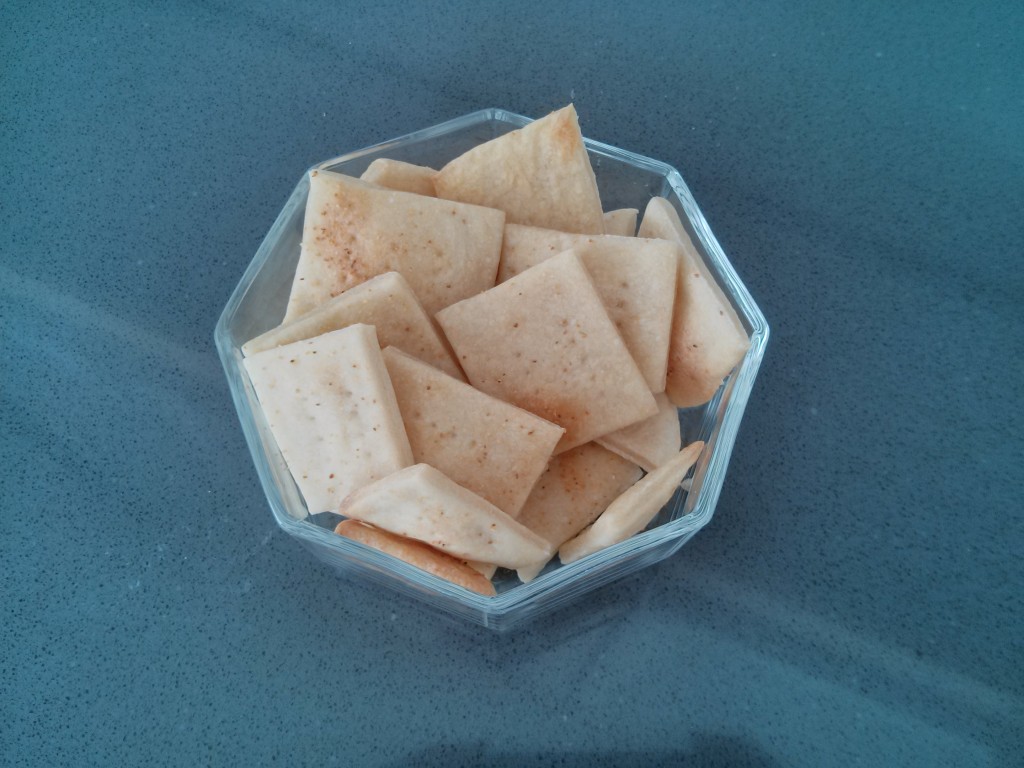
Crackers, because I can

Yep, making crackers, because they are easy, and fast, and taste so much better fresh from the oven and I know what’s in them. And they happen to be vegan.

Crackers, Grommit!

Crackers, Grommit!

Ingredients:

  • 200 gr flour
  • 120 ml room temperature water
  • 1-2 tbsp olive oil
  • 1/2 tsp salt

Make them:

  1. Mix all ingredients together (by hand with a fork or with a kitchen robot – you might want to double or triple the recipe in the later case). Knead a couple times by hand to form a nice smooth dough. Form a ball, wrap in plastic wrap, and stick in the fridge for at least an hour, up to a day.
  2. Let dough come to room temperature for 10-15 minutes. Meanwhile, preheat oven to 180°C & line 1 baking tray with baking paper.
  3. Roll the dough about 3mm thin (this is easier between cling film or silicon baking mats). Prick all over with a fork. Using a knife or a pizza cutter, cut into squares about 5cm in side. Brush with water & sprinkle with some sea salt / dried herbs of your choice (sprinkling optional). Move to lined baking trays.
  4.  Bake for 12-15 minutes, until golden.
  5. Let cool on a rack slightly before tucking it, lest you burn your mouth!

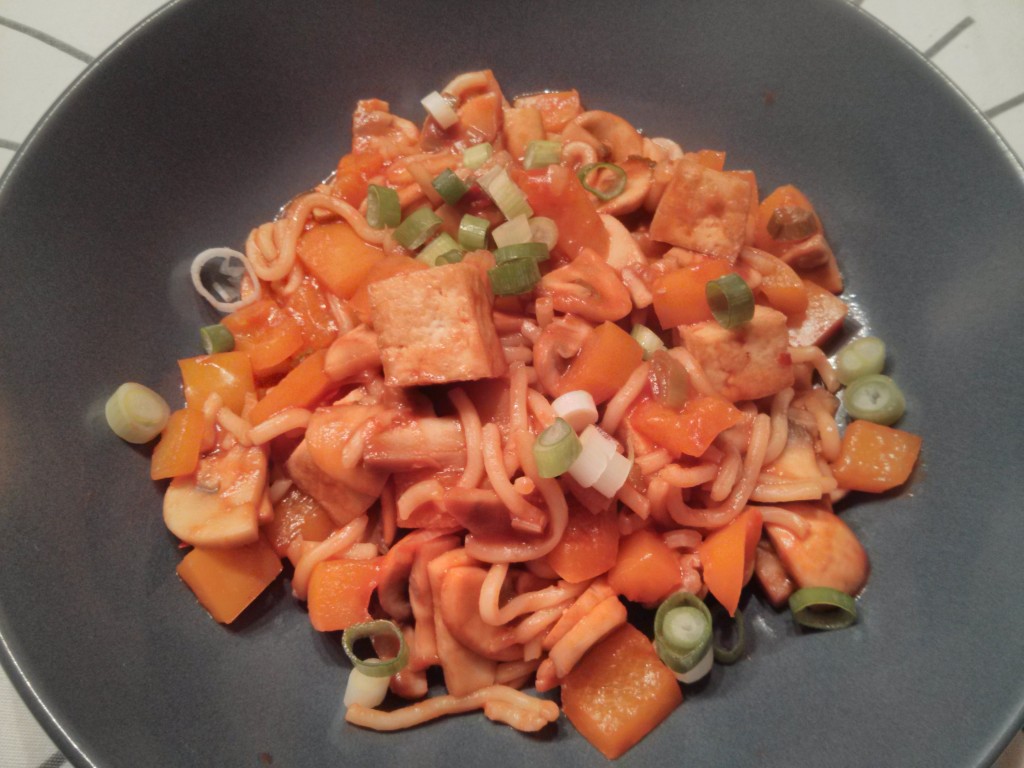
Mushroom & Tofu Sang Choy Bau

Today’s dinner brought to you inspired by a recipe that I read somewhere, and with the “40 days without meat”1 campaign in mind.

Mushroom & Tofu Sang Choy Bau

Mushroom & Tofu Sang Choy Bau

Serves: 2

Ingredients:

  • 1 250 gr block firm tofu
  • 10 gr / ~ 1tbsp sesame oil
  • 500 gr mushrooms, clean & sliced
  • 1 orange (or yellow) bell pepper, diced
  • 3-4 spring onions, sliced
  • 1 small tin (70gr) tomato concentrate
  • 1 tbsp mushroom “oyster” sauce (or the real thing if you’re not vegetarian)
  • 2 tbsp soy sauce
  • 1 tsp sambal oelek
  • 1/2 tsp garlic powder
  • 1 pack (150 grams) straight-to-wok noodles

How to:

  1. Wrap tofu in a couple paper towels and press dry with hands. Cut in 1.5cm cubes. Heat up a non-stick pan on medium, once it’s hot, add the tofu cubes, and let them cook without touching them for 4-5 minutes, until golden, then turn, and repeat until all sides are golden and slightly crunchy.
  2. Heat up oil in a wok. Add mushrooms and cook, stirring, for 3-4 minutes, until tender. Add the bell pepper & half the spring onion, and cook for a couple of minutes.
  3. Meanwhile, in a bowl, mix the tomato paste, mushroom “oyster” sauce, soy sauce, sambal oelek & garlic powder with 3-4 tbps of water, enough to make it pourable (might need to add some more water). Add to the mushrooms and cook 2 minutes. Add the noodles, stir and cook for another couple of minutes.
  4. At this point, all sides of the tofu should be golden. Add tofu to the mushroom mix. Stir to coat.
  5. Sprinkle remaining spring onion on top before serving.

Bon appetit!

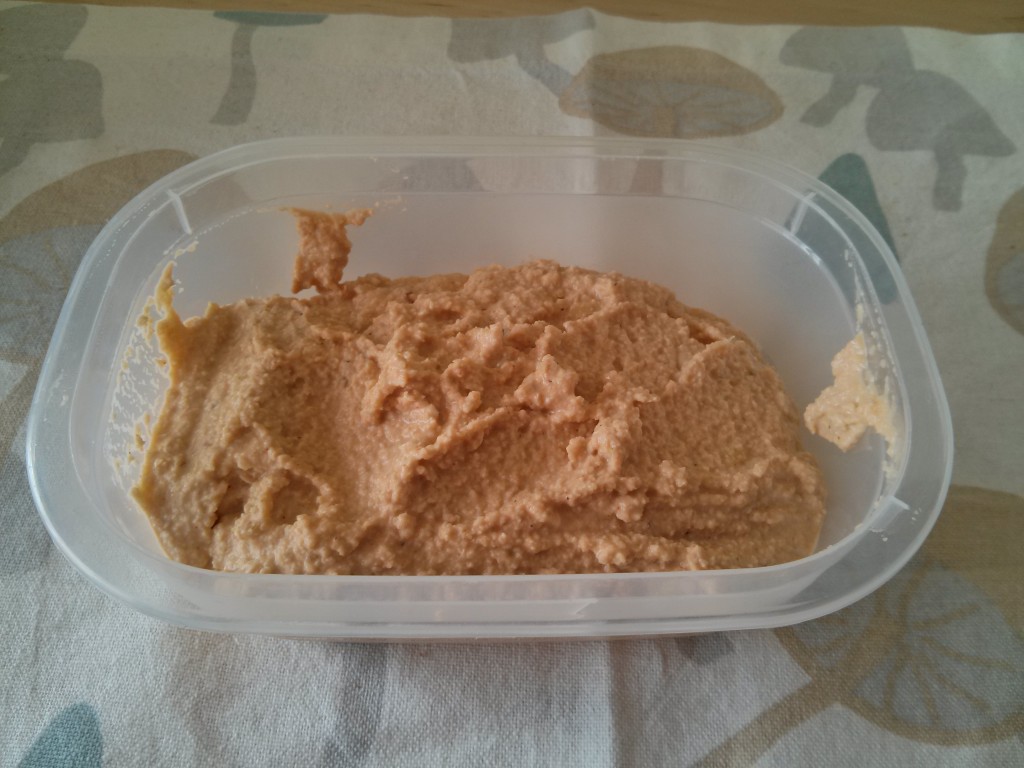
Cashew nut dip / spread

Cashew nut dip

Cashew nut dip

Ingredients:

  • 120 gr roasted cashew nuts, soaked in water for 3-4 hours & then drained
  • 4 spring onions, white parts only
  • 1/2 tsp smoked paprika
  • 1/2 tsp granulated garlic
  • 1 tsp freeze dried shallot
  • 3 tbsp (10 gr) nutritional yeast
  • 2 tbps (20 gr) olive oil
  • 60-100 ml water

Make it:

Put all ingredients in a food processor (starting with about 50 ml water). Process until creamy, adding water if necessary. Scrape the sides of the bowl often to obtain a nice creamy dip. Add more water if you want to turn this into sauce for nachos.


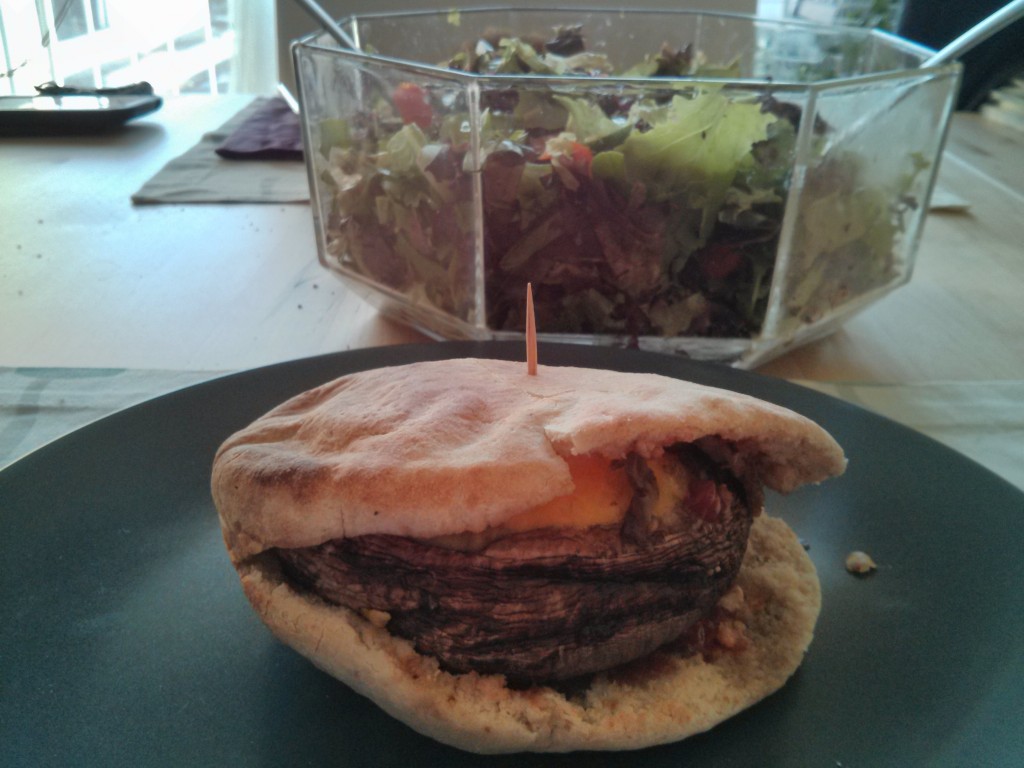
Egg filled portobello burgers

Portobello burger with salad in the background

Portobello burger with salad in the background

Ingredients (for one burger):

  • 1 portobello (about 10-12 cm in diameter, or 70-80 grams in weight)
  • 1 egg, beaten
  • 1 tbsp grated cheese (mozzarella is a good option) or a slice of cheese to top it all
  • salt & pepper
  • one pita bread that fits the portobello
  • fixings to taste: mustard, mayonnaise, ketchup, pickles….

Instructions:

  1. Preheat oven to 180°C. Oil an oven proof dish that fits the portobelo(s).
  2. Put portobello(s) in the oven dish, underside up. Season mushroom lightly with salt and pepper.
  3. Season beaten egg with salt and pepper, and pour it inside the mushroom cap, trying to not spill. Top it with the grated cheese (as much as the cap can hold, do not overfill since it will bake over otherwise) or wait with the cheese for now.
  4. Put dish with mushroom(s) in the oven and bake for 30-35 minutes, until the egg has set. If using sliced cheese, top the mushrooms with it for the last 5 minutes, to allow it to melt.
  5. Pop the pita bread in a toaster until warm, crunchy and puffed. Let cool enough to handle. Slide burger into pita pocket and add desired toppings.
  6. It is handy to use a toothpick to keep the burger in place while eating it!

I like to serve the burgers with a big salad: mixed greens, carrots, cucumber, tomatoes, and vinaigrette dressing. Feel free to serve whichever way you usually do with burgers.