Plum frangipane tart

Another invite for dinner at friends calls for another dessert to be baked. It had to be vegan (=egg & lactose free), gluten free and nut free. And I just didn’t fancy repeating something I had already made.

For some reason frangipane tart had lodged itself in my head, and so I decided to make one.

Picture of a plum frangipane tart still in its mold, resting on a cooling tray, on a dark kitchen counter

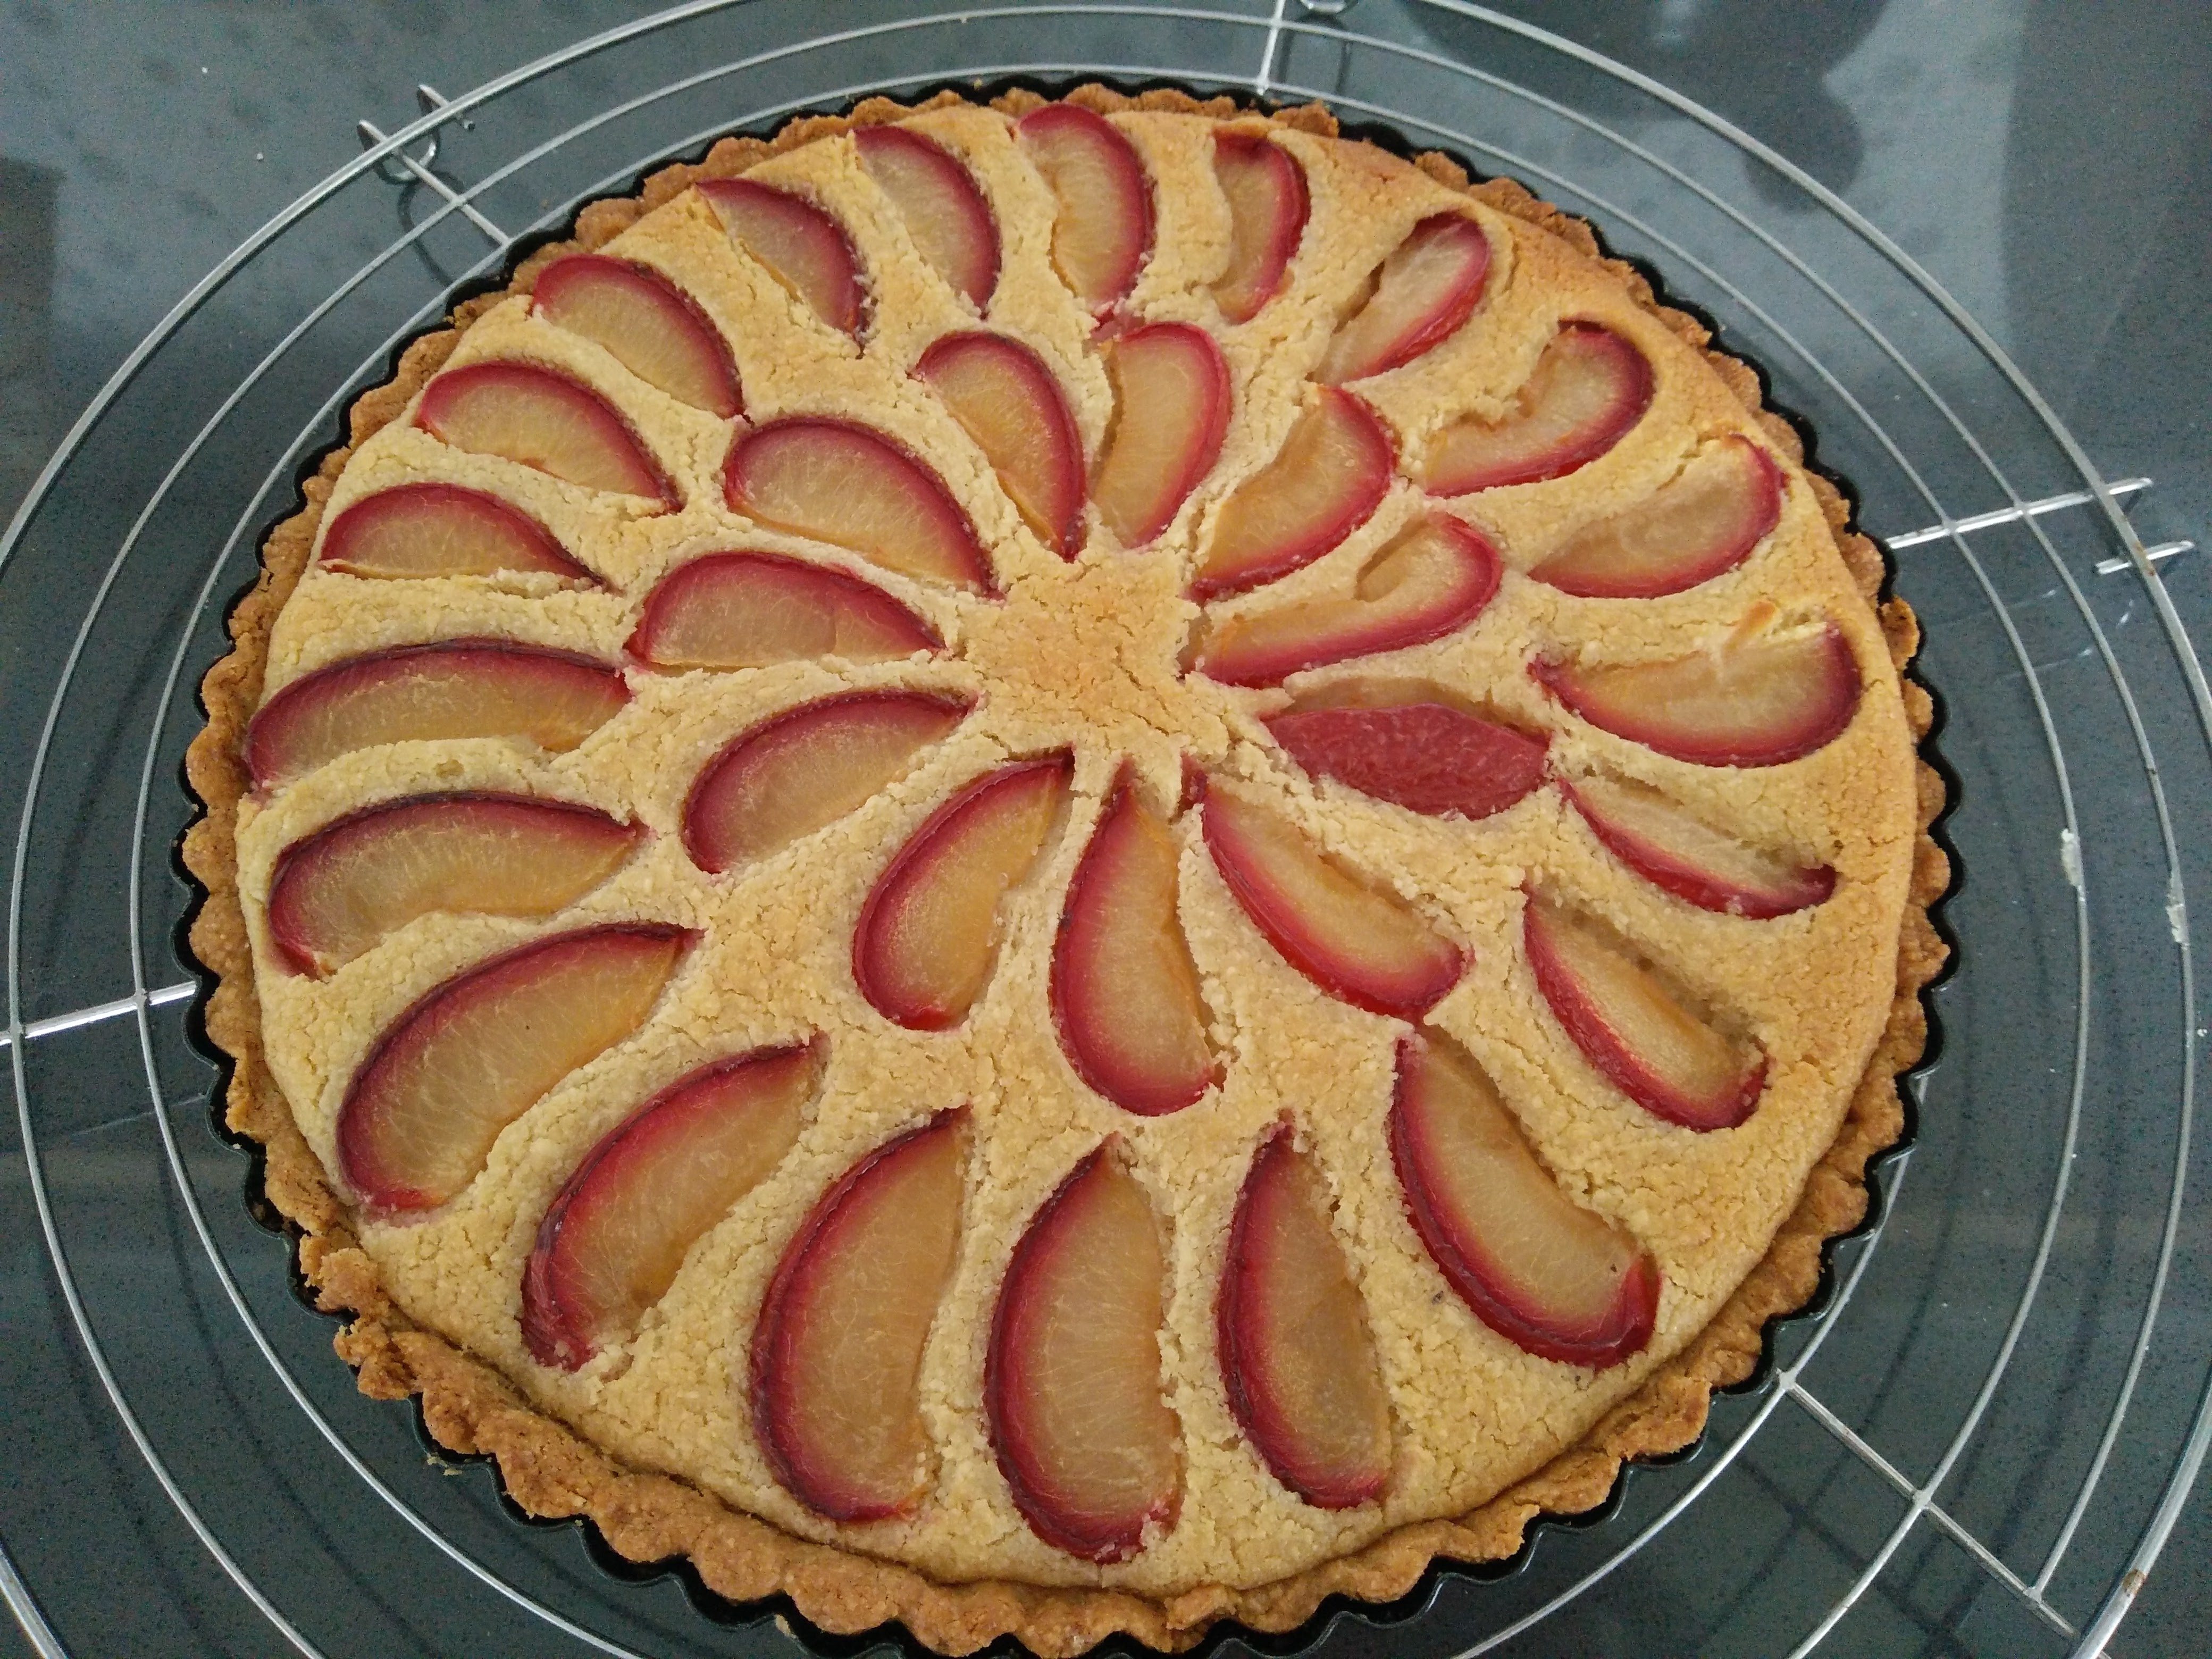
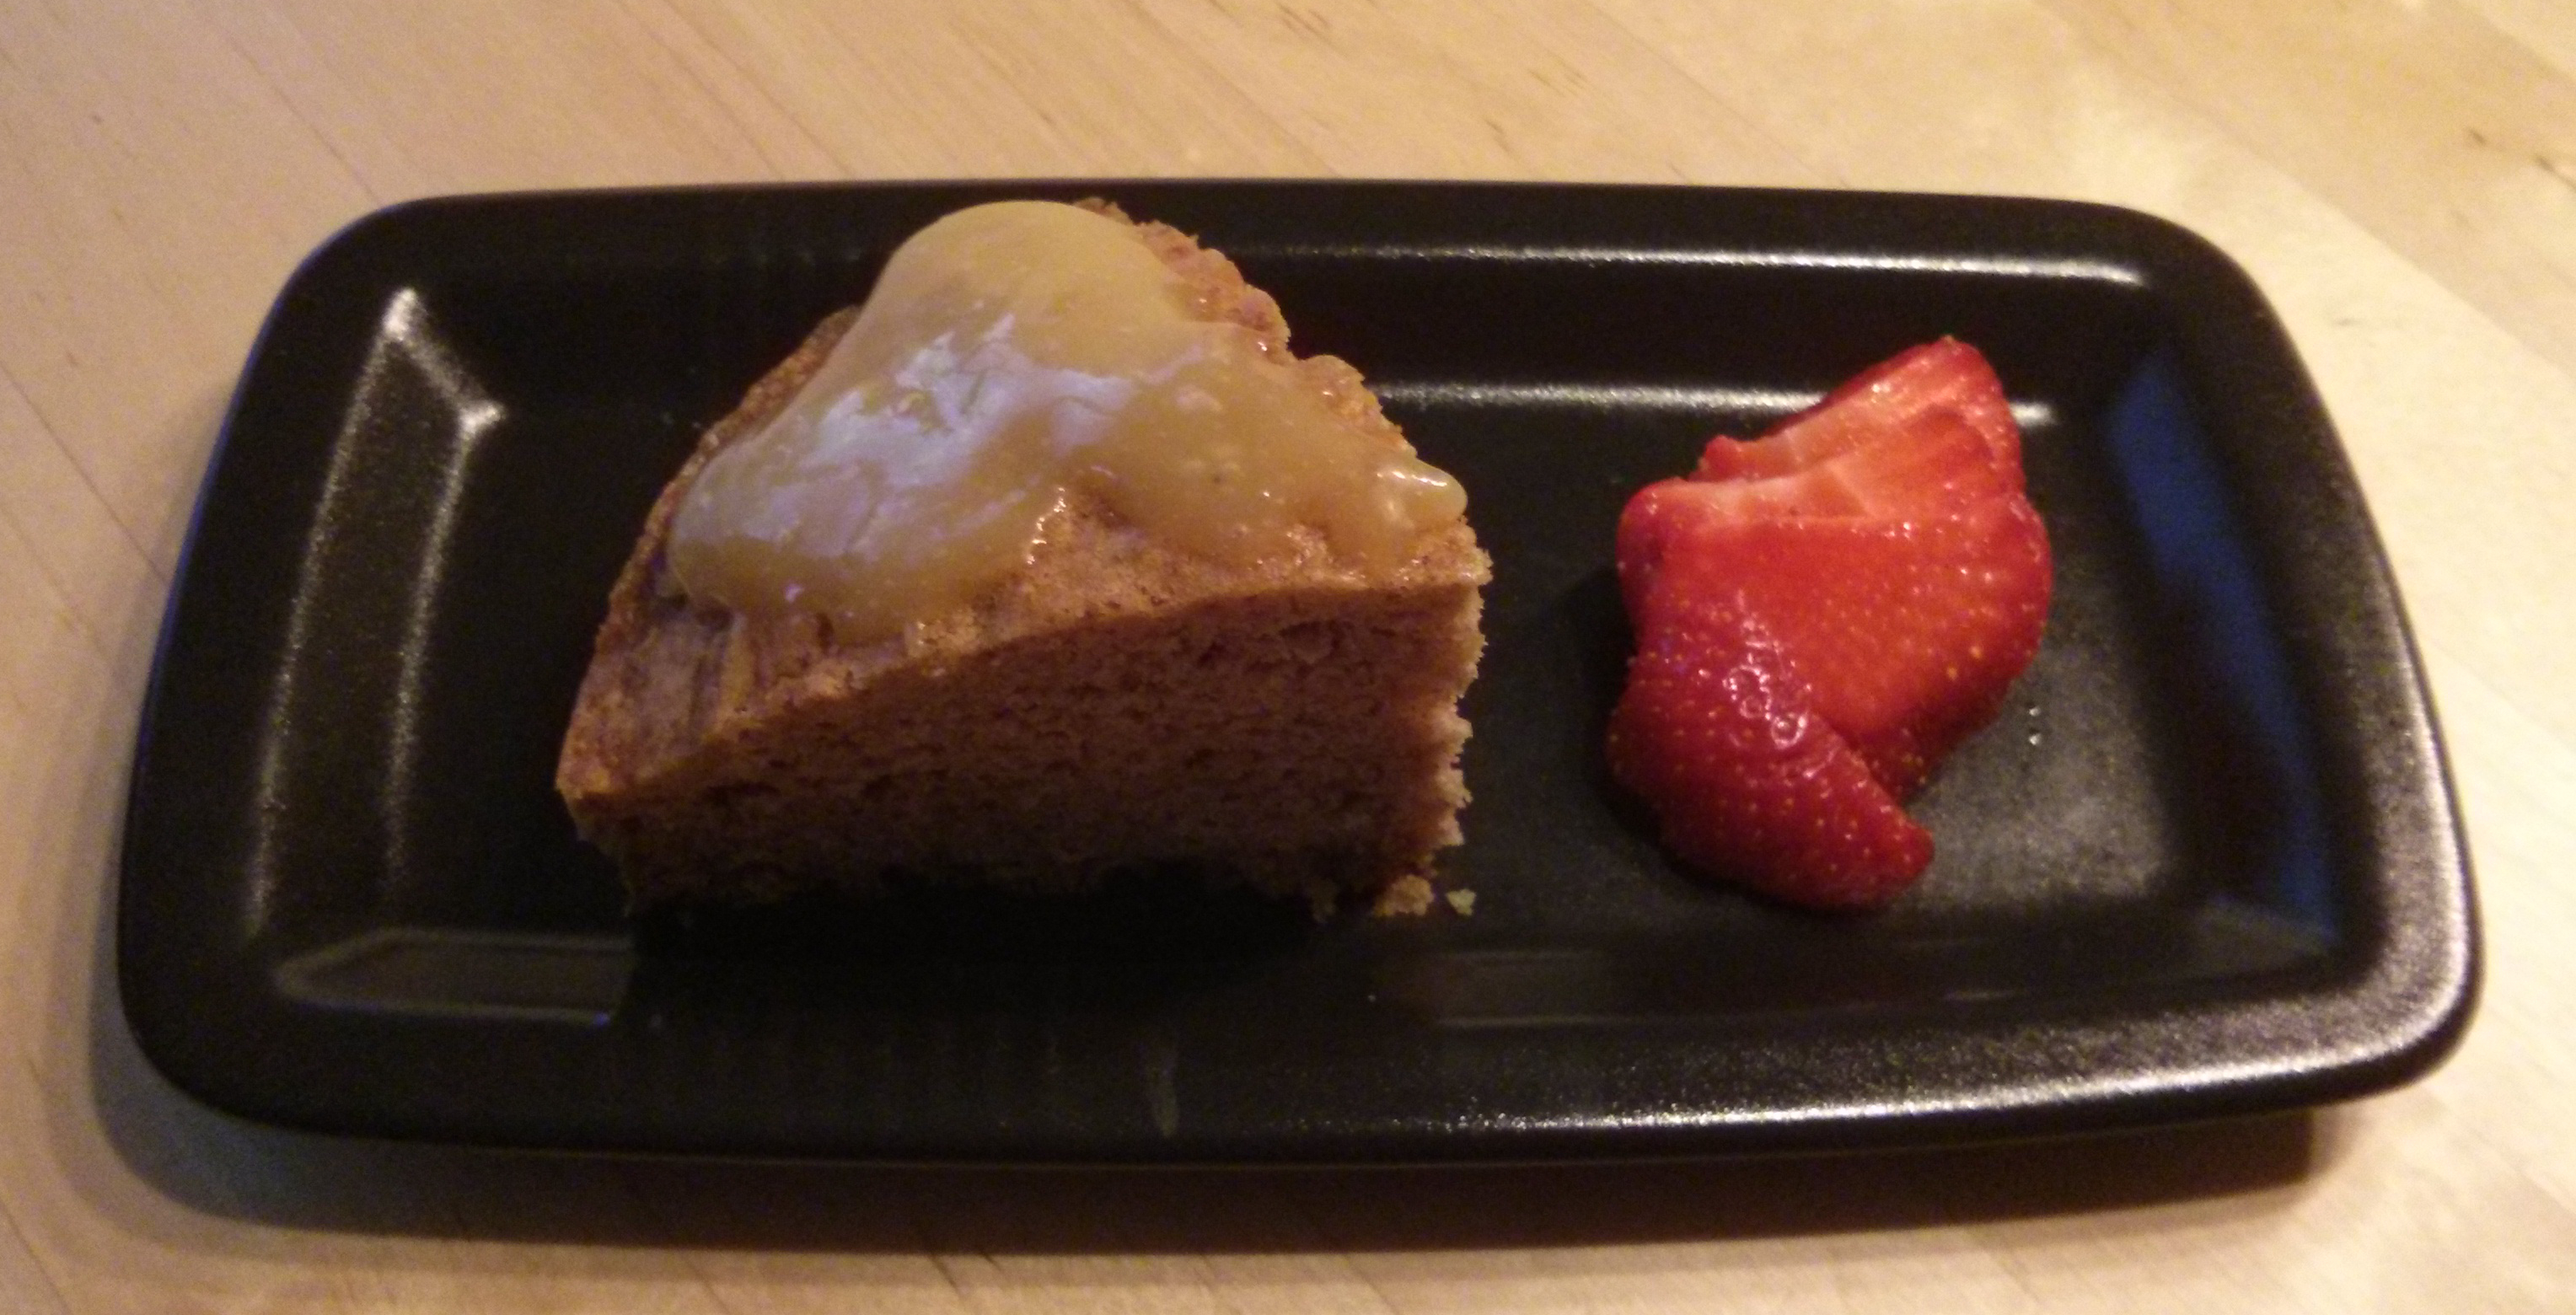
Plum Frangipane Tart

Ingredients

Press-in almond crust

  • 2/3 cup almond meal (approx 65 grams)
  • 1 cup oat meal / ground oats (approx 90 grams)
  • 2 tbsp sugar (approx 30 grams)
  • 1/2 tsp salt
  • 6 tbsp refined coconut oil (approx 65 grams)
  • 4 tbsp cold oat milk (approx 60 ml)

Frangipane filling

  • 125 gr almond meal
  • 125 gr oat flour
  • 150 gr powder (confectioner) sugar
  • 75 gr refined coconut oil, melted
  • 2 egg replacements (20 gr v-eggie + 140 ml oat milk)
  • 120 ml oat milk
  • 2 tsp vanilla essence

To bake

  • 6-8 plums

Instructions

For the crust

  1. Preheat oven to 180°C.
  2. In a stand mixer (paddle attachment) or food processor, mix all ingredients until a ball forms.
  3. Press crust on the bottom and up the sides of a loose bottomed fluted tart mold (24cm diameter).
  4. Bake crust in preheated oven for 15 to 20 minutes, until it starts to dry out.
  5. Take out and let cool for a few minutes (while you make the filling).

For the filling

  1. In a stand mixer (wire whisk), or by hand with a very stiff whisk / electric beaters, mix all ingredients for the frangipane until a smooth consistency is achieved.

For the tart

  1. Scoop most (you might have leftover) filling and fill the pre-baked crust, leaving a bit of head space (about 5mm).
  2. Slice plums in half, remove pit, and slice each half in thirds or quarters (depending on size and own taste).
  3. Arrange plum slices on top of the frangipane.
  4. Bake tart for 45-60 minutes at 180°C, or until the frangipane starts to turn golden and a toothpick inserted in the middle comes out dry.
  5. Let cool in mold on cooling rack.

Notes

  • This recipe is heavily adapted from several vegan and non-vegan recipes.
  • Feel free to use margarine instead of coconut oil.
  • The amount of sugar in the filling can be changed to taste. Next time I might go for 125gr instead of 150gr, since it was more than sweet enough for us.
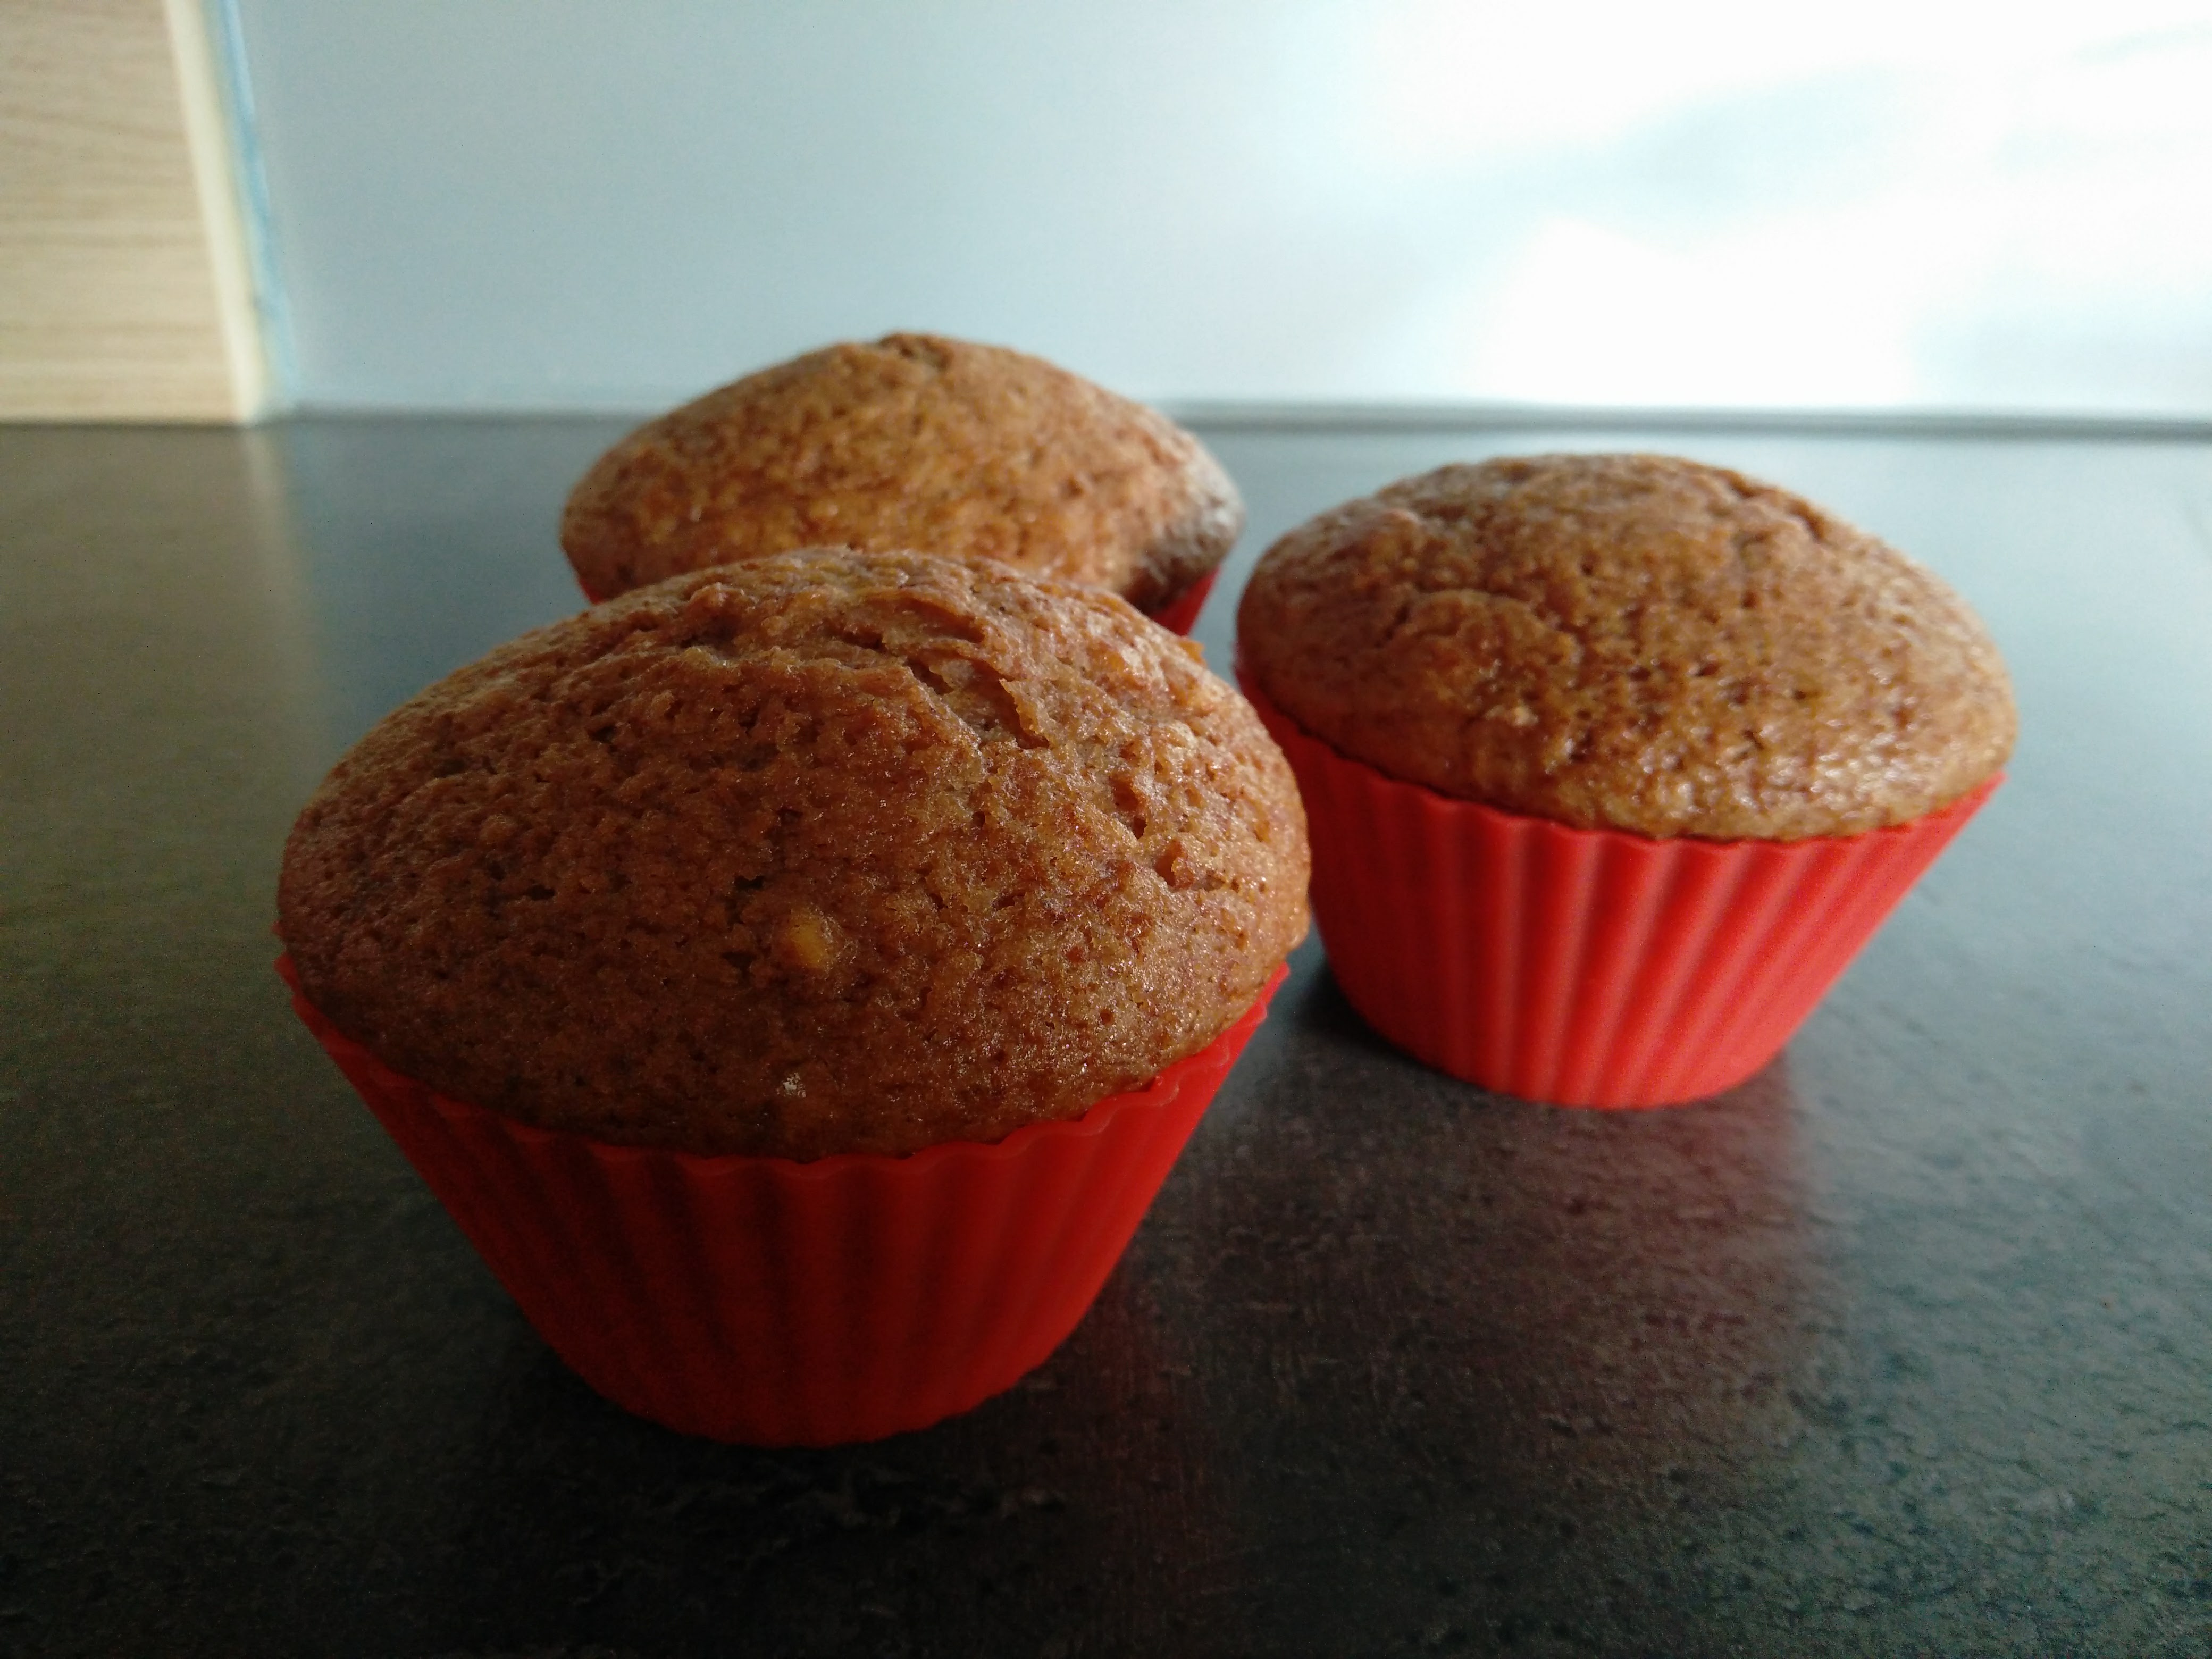
  • What to do with the leftover filling: divide filling into ramekins or muffin tray, top with more sliced fruit, and bake for about 35 to 45 minutes.
  • Try it with whichever fruit is seasonal and you like!


Applesauce muffins

These muffins are based on the previous recipe, Pumpkin muffins, but aren’t gluten free.

Inspired by a jar of apple sauce that needed using up, and having a day of board games planned, baking muffins to feed our friends (other than crisps, fried stuff & sandwiches) sounded like a good idea.

The muffins are ready in 45 minutes. Total. Of those, 30 minutes are baking time, so you can do your cleanup meanwhile. Quick bakes are also a bonus point in my book!

Applesauce muffins

Applesauce muffins

Ingredients

  • 350 grams applesauce
  • 80 ml mild (olive) oil
  • 2 eggs
  • 175 grams cane sugar
  • 200 grams flour
  • 1/2 tsp salt
  • 1 tsp baking powder
  • 1/2 tsp baking soda
  • 2 tsp speculaas spice mix

Instructions

  1. Preheat oven to 175°C. Line 12 muffin tin with paper or silicon liners.
  2. In a bowl, whisk together flour, baking powder, baking soda, salt and spices.
  3. In a blender, mix applesauce, olive oil, and sugar. Blend until smooth. Add eggs and pulse until mixed.
  4. Add applesauce mix to dry ingredients and mix until well combined.
  5. Divide dough between the 12 cavities.
  6. Bake at 175°C for 30 minutes or until a toothpick inserted in the middle of a muffin comes out clean.
  7. Let cool in muffin enough to handle, remove muffins from tin and let cool on rack.

What have I been up to

The last five months have been rather quiet around these parts, and it’s not for lack of things happening, but exactly the opposite. There has been so much going on that I haven’t had the time to write about our vacation or post a recipe (or even a picture) here.

First things first. I graduated! It took 14 years, two countries and a change of degrees, but I am officially an Engineer. Official title being Master of Science in Civil Engineering. Fancy, ain’t it? In order to achieve this, of course, I had to finish my master’s dissertation, write a whole book on it, and defend it in front of my promoter & advisers, plus an infiltrate (foreign doctorate student) that was happy my defense was in English and not in Dutch so he’d be able to follow along. A few weeks later I got to wear a graduation gown and cap and throw said cap in the air for the pictures :)

And then we worked hard for three weeks to get our house(!) in order so we could move in. That meant very long days sanding and prepping walls and ceilings, painting and more painting, installing flooring and bathroom furniture and a whole lot of cleaning. Also getting the kitchen installed (snafu from the company: our counter was requested without a hole for the induction stove, we’re now waiting for it to be replaced).

We then had a fun 1st of November. Epic moving weekend! We managed to move everything with the help of friends & family, and we’re now getting slowly into the hang of (new) things. There are still a few things to finish around the house but it gets done bit by bit.

And finally, the job search for me. Looking for a position as an in-office engineer, doing calculations & stuff. There are many positions for construction managers, but not that many for designing engineers it seems. So the search goes slower than I wish. I have also had my fill of “your profile is very interesting for our company, but we don’t have a matching position at the moment” replies. When they called me!

Anyway, that has been the last five months of my life. Time has flown by and I hope next year I have (make) more time for posting here.

Cinnamon oatmeal cake

It’s Jan’s birthday, and the birthday boy deserves a birthday cake. I gave him three options to chose from: lemon curd filled lemon cake, chocolate cake or cinnamon oatmeal cake. He chose the latter, because it sounded “weird”. So I adapted a recipe from Dessert for two a little bit, and here we are!

Cinnamon oatmeal cake with salted caramel sauce

Cinnamon oatmeal cake with salted caramel sauce

Cinnamon oatmeal cake

(adapted from Dessert for two)

Ingredients

  • 15 gr oats
  • 60 ml hot water (straight from the kettle)
  • 85 gr salted butter (or use unsalted and add a pinch of salt)
  • 35 gr dark brown sugar (cassonade)
  • 30 gr cane sugar
  • 1 large egg
  • 100 gr all purpose flour
  • 1/2 tsp cinnamon
  • 1/4 tsp baking soda
  • 1/8 tsp baking powder

Instructions

  1. Preheat oven to 175°C. Line a 15 cm spring form with parchment paper and grease. Set aside.
  2. In a small bowl / ramekin, add oats & hot water and set to soak.
  3. Meanwhile, in a medium bowl, cream butter and sugar very well. Then add the egg and mix (it’ll split, it happens).
  4. In a smaller bowl, mix flour, cinnamon, baking soda & baking powder. Add dry ingredients and soaked oats (and if there is liquid left, the liquid) to the creamed butter mix, and stir until combined.
  5. Transfer batter to lined spring form. Bake in oven on center rack for about 30 minutes or until a toothpick inserted in the middle comes out clean.
  6. Remove cake from oven, let it cool for 5 minutes before removing from spring form.

Salted caramel sauce

(adapted from Cookies & Cups)

Ingredients

  • 25 gr butter
  • 75 gr cane sugar
  • 100 ml cream (20% fat)
  • pinch of salt
  • 1/2 tsp vanilla extract

Instructions

  1. In a big microwave safe bowl melt the butter. Then add the sugar and cream and whisk until the sugar has dissolved.
  2. Microwave on high (750W) for 2 minutes. Remove from microwave and stir.
  3. Microwave again for 1 minute, until bubbly and slightly thickened. Remove from microwave, add salt & vanilla extract and mix well.
  4. Sauce will thicken as it cools.

Warming soup with kohlrabi, sweet potato & tofu

Yes, another veggie recipe!

Today the weather is crummy. Grey, dark, gloomy, hail-snow-melting snow-rain kind of day. So I decided on a soup for dinner.

Warming soup

Warming soup

Ingredients:

  • 1/2 tbsp oil
  • 1 small onion, peeled & chopped (~ 100 gr)
  • 2 fat cloves garlic, peeled & minced
  • 2 small carrots, peeled & sliced (~ 100 gr)
  • 1 kohlrabi, peeled & cubed (~ 500 gr)
  • 2 sweet potatoes, peeled & cubed (~ 350 gr)
  • veggie broth (I use instant)
  • salt & pepper
  • 1 block tofu (~ 250 gr)
  • pinch cayenne pepper (optional)
  • 1/4 tsp spicy smoked paprika

Instructions:

  1. In a soup pot, heat up oil. Add onion and garlic and cook until golden. Then add carrots and cook for a couple minutes. Add kohlrabi and cook a couple more minutes. Add sweet potatoes and toss together.
  2. Cover veggies with broth, bring to a simmer and let cook for 15 minutes. Taste, adjust seasoning with salt & pepper. Add cayenne and paprika.
  3. Meanwhile, cube the tofu and dry fry until golden.
  4. Add tofu to soup just before serving.

Servings: 2 servings as a main, 4 as a starter.

Nutritional info: (all values are approximate!)

Calories: 453
Protein: 26 gr
Fat: 12 gr
Carbs: 65 gr

Random Organization Idea

We have upgraded our freezer, and since it now is more than twice the size of the older, we thought it’d be a good idea to try and keep it organized. At first we thought we could buy adhesive blackboard and stick it on the front, but then we found out that there is such thing as electrostatic blackboard film! That won’t damage the surface like glue might do, so we went for that option. Then you just need a chalkboard marker or two, and this is the result:

Organized freezer

Organized freezer

What you need:

  • one shiny new (or old) freezer (or fridge) that you want to get organized,
  • one roll electrostatic film (ours is black Legamaster Blackboard, comes in a roll of 25 sheets 60cm wide by 80cm tall)
  • scissors to cut the film to fit your freezer
  • chalkboard markers (either dry erase or not)

What you do:

  1. Measure the surface you want to cover, and cut as much electrostatic film as needed.
  2. Place the film on the freezer door. Use a dry cloth to smooth it. Easy to move around and you can reattach it as needed.
  3. Write the contents of your freezer for the world to see. Ours are organized by drawers. It’s handy to write the date of the leftovers so you know when you put them in there.
  4. And you’re done!